Material Groups are a way to group your Materials together. By creating these groups, you are able to easily find the Material you are looking for when adding it to a Work Item.
How to Add Material Groups
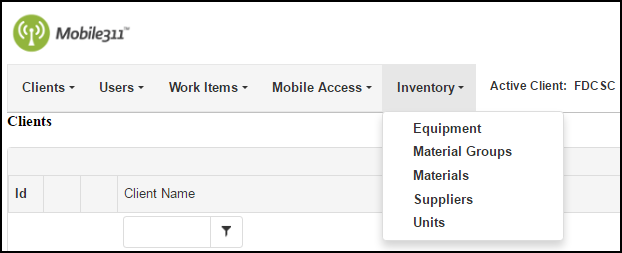
- Hover over the Inventory tab and click Material Groups.

-
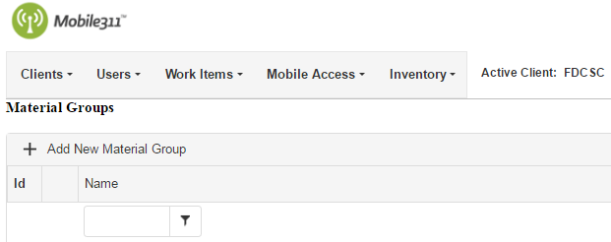
Click on Add New Material Group at the top of the Material Group list.

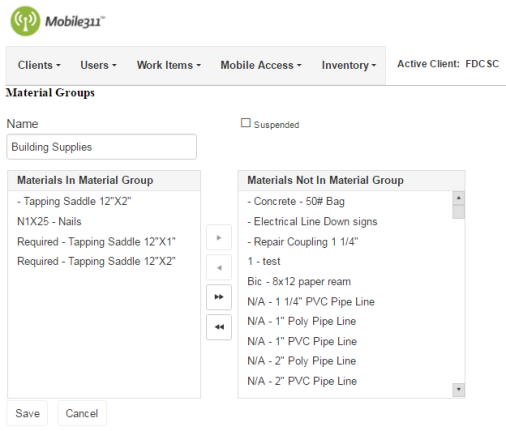
- Enter a Name for the Material Group. *Note: This is a required field.
-
Select Materials from the Materials Not In Material Group box and use the left arrow to add them to this Material Group. Materials that are in the Material Group will show in the Materials In Material Group box. You are able to add the same materials to multiple groups. For example, if you have a Sewer Material Group and a Streets Material Group, you may need to add certain construction supplies to both groups.
- Click the Save button when you are finished.

Updating a Material Group
- Hover over the Inventory tab and click Material Groups.
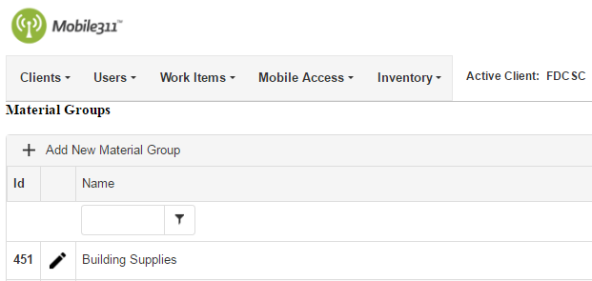
- Click on the pencil icon next to the Material Group that needs to be updated.

- On the next screen, make any necessary changes and click the Save button when you are finished.
Suspending a Material Group
If you are no longer using a Material Group, you have the option of suspending it so that it cannot be selected on a Work Item nor views in the Material Group list.
- Hover over the Inventory tab and click Material Groups.
- Click the pencil icon next to the material group that needs to be suspended.
- Check the Suspended box at the top of the page.

- Click the Save button when you are finished.
